Publishing Microservices into Google Kubernetes Engine (GKE)
 Google Cloud icon by Icons8
I will show you how to publish the Mamazinha Baby Care Web App - Open Source Project on Google Kubernetes Engine (GKE) .
Before we start
I used JHipster to build the web app, everything you need to know about how to generate the Kubernetes (k8s) yml files to publish on GKE is detailed step by step in this tutorial (I strongly recommend watching the video first before getting your hand dirty 😁) created by @mraible
Publishing on GKE
I open source the yaml files that i used to publish on GKE:

I’ll cover here the Google Cloud configuration that I made to run my project as cheap as possible. My goal is to keep the cost below or near the Always Free tiers:
The GKE free tier provides $74.40 in monthly credits per billing account that are applied to zonal and Autopilot clusters. If you only use a single Zonal or Autopilot cluster, this credit will at least cover the complete cost of that cluster each month. Unused free tier credits are not rolled over, and cannot be applied to any other SKUs (for example, they cannot be applied to compute charges, or the cluster fee for Regional clusters).
Initial setup
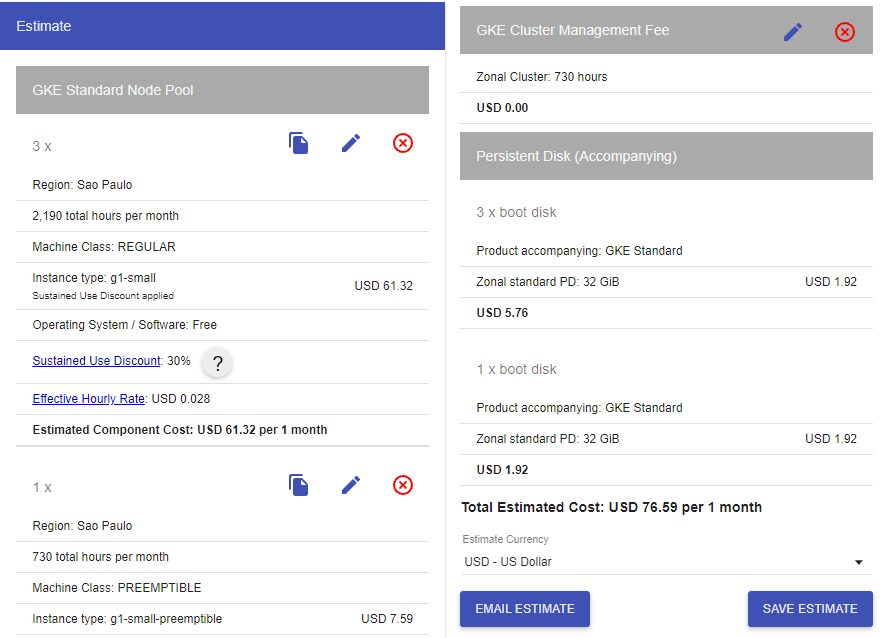
So I made this pricing simulation (I choose São Paulo as my Region because I am from Brazil):
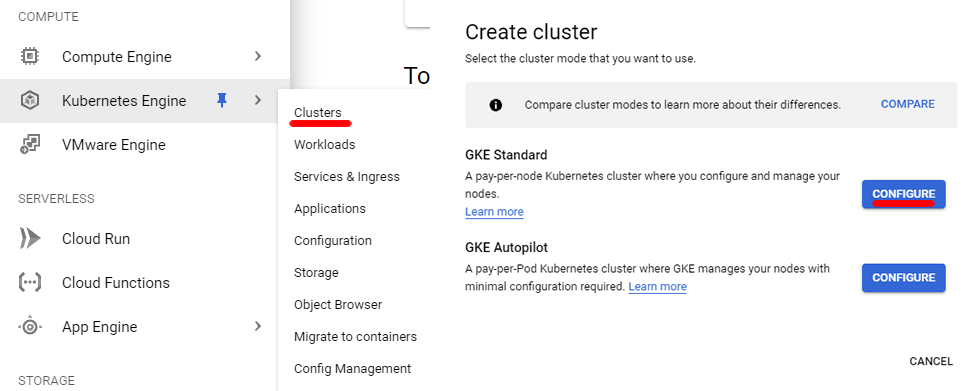
After logging in at Google Cloud Console, Let’s create the Cluster Zone and the first Node Pool
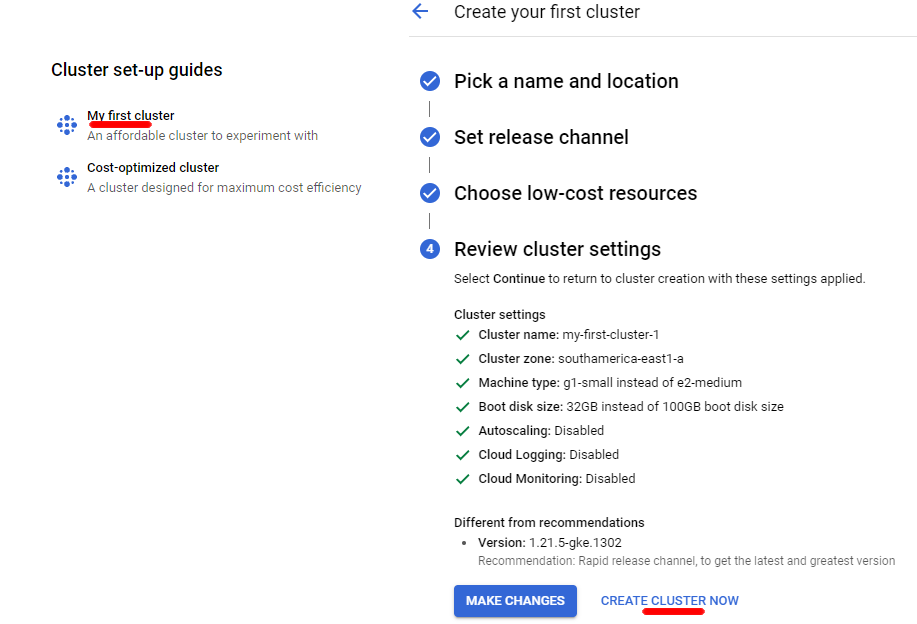
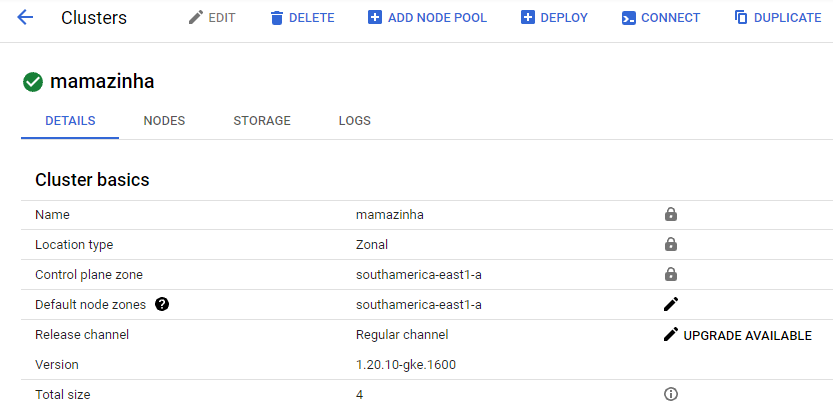
Now you have to connect to your cluster. Install google cloud SDK and install Google kubectl (I’m using windows)
gcloud components install kubectl
On git bash:
- confirm that the installation was successful
wich kubectland the response should be something like/c/Users/AccountName/AppData/Local/Google/Cloud SDK/google-cloud-sdk/bin/kubectl - execute the following command to connect to your cluster, change
mamazinhato your cluster name and changesouthamerica-east1-ato your zonegcloud container clusters get-credentials mamazinha -zone=southamerica-east1-a
You can now publish the yml files to GKE:
- clone the repository
git clone git@github.com:renanfranca/mamazinha-k8s.git - Switch to google-cloud branch
git checkout google-cloud - On git bash go to the root of the cloned project folder and run the command
./kubectl-apply.sh -f
Install the amazing k9s https://k9scli.io/topics/install/ and type the command to connect to your cluster k9s -n mamazinha

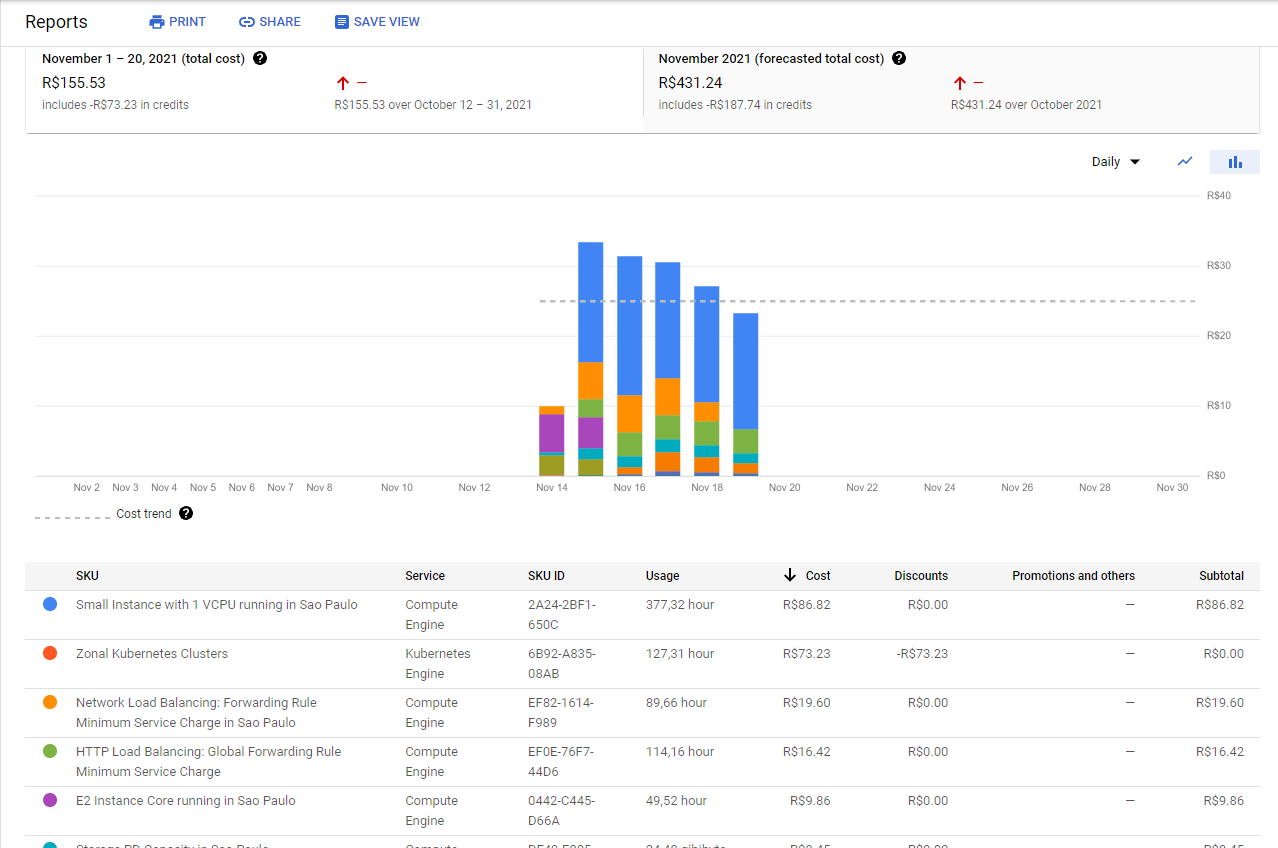
As you can see only 3 nodes weren’t enough for my project, after digging around I discovered the preemptible VM option 😆! The registry/baby microservice both are stateless, so I don’t care if after 24h the VM will be destroyed and they will be initialized at another VM.
Let’s create a new node pool with a preemptible VM which costs less than the regular machine type.

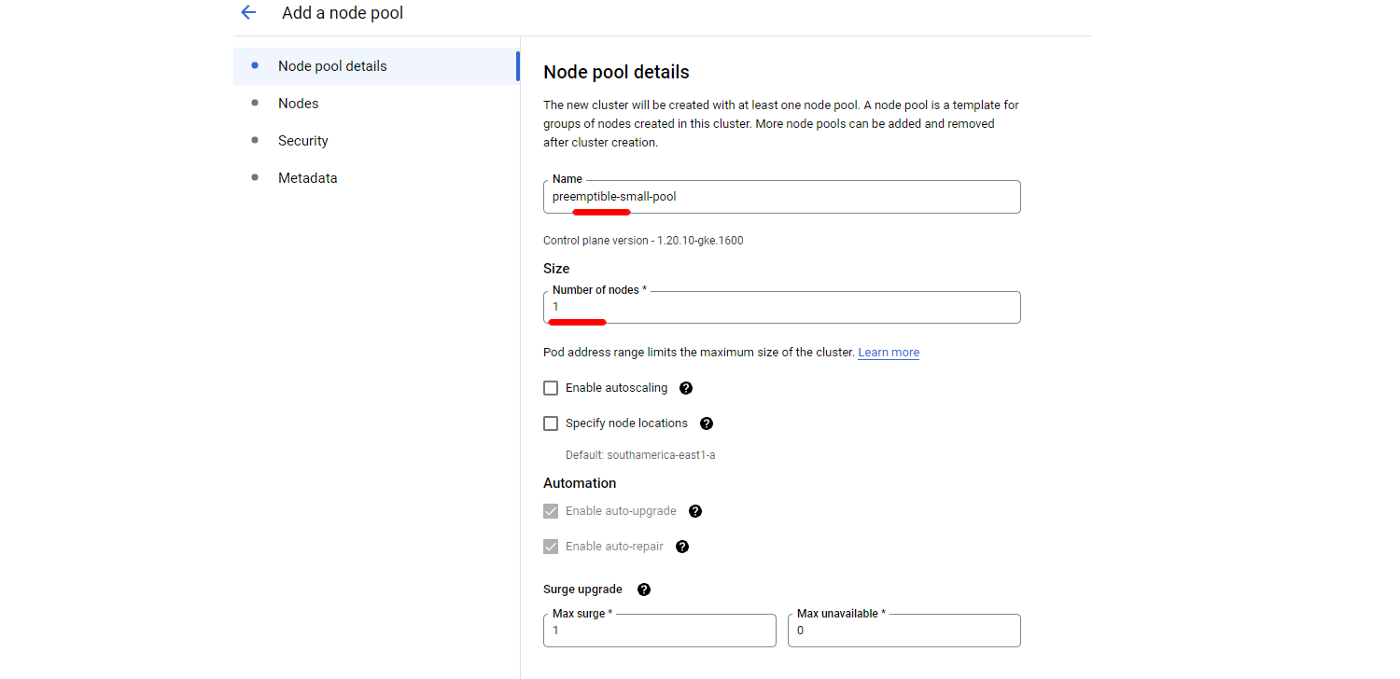
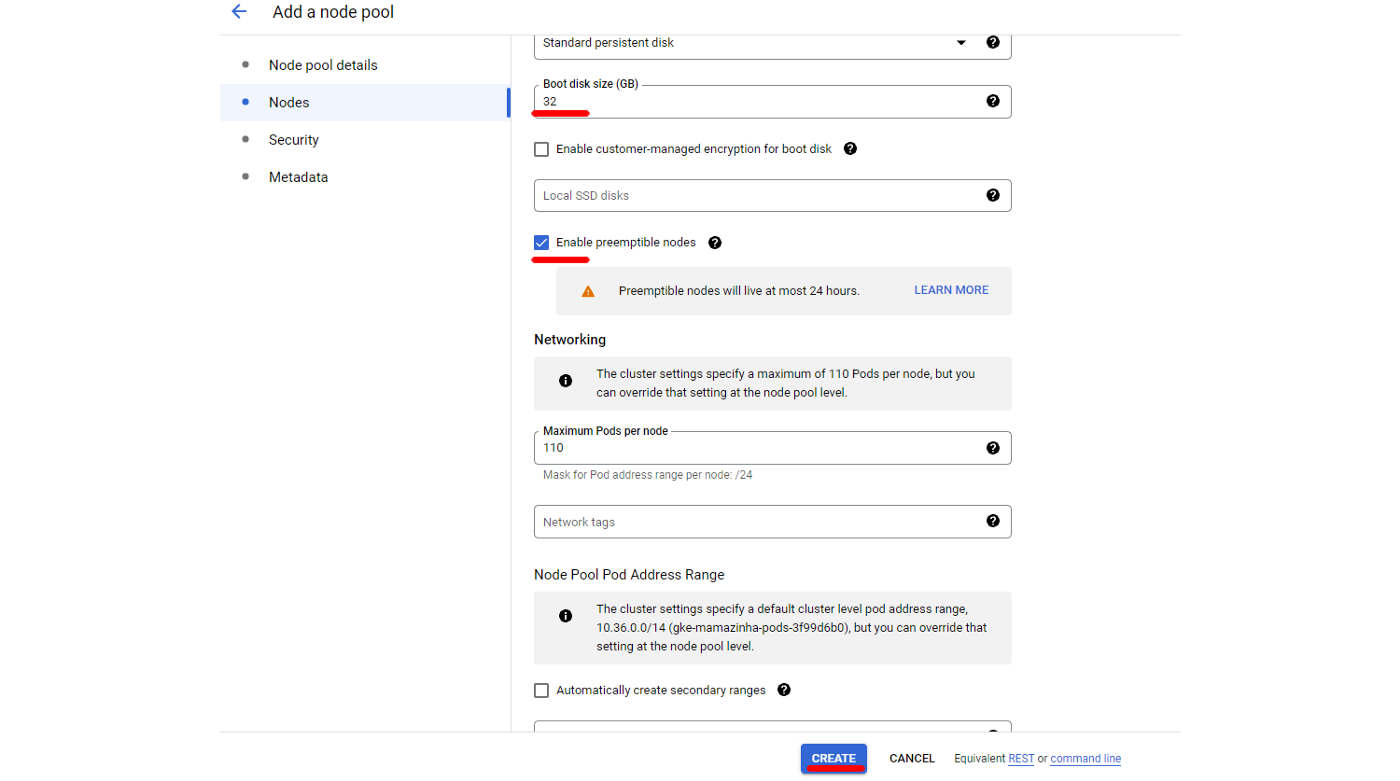
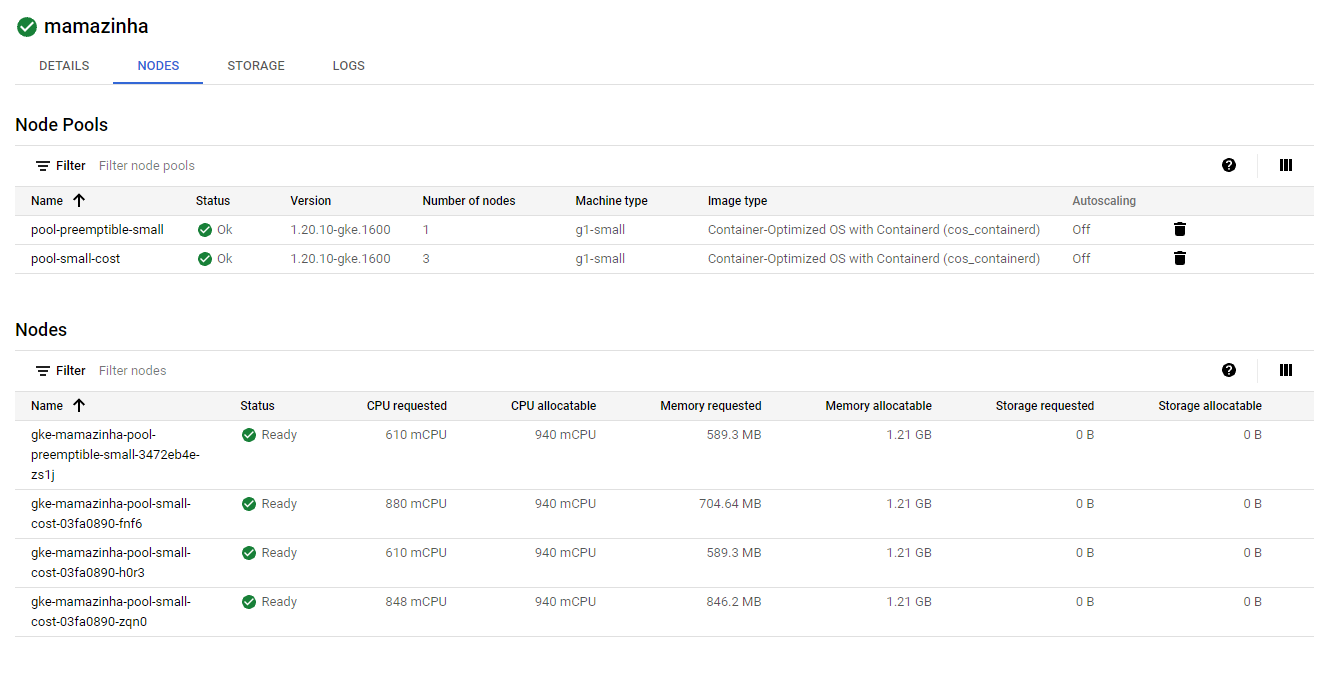

The cluster is ready! But how to choose the place to deploy each component of my project? The Postgres database can’t be deployed at the preemptible node, because the data will be lost every 24hrs!
The answer is NodeAffinity, let’s take the gateway as an example. I want to always deploy the gateway on the node gke-mamazinha-pool-small-cost-03fa0890-zqn0
- Create a label for the node
kubectl label nodes gke-mamazinha-pool-small-cost-03fa0890-zqn0 app=gateway - Add this nodeAffinity property to my yml file
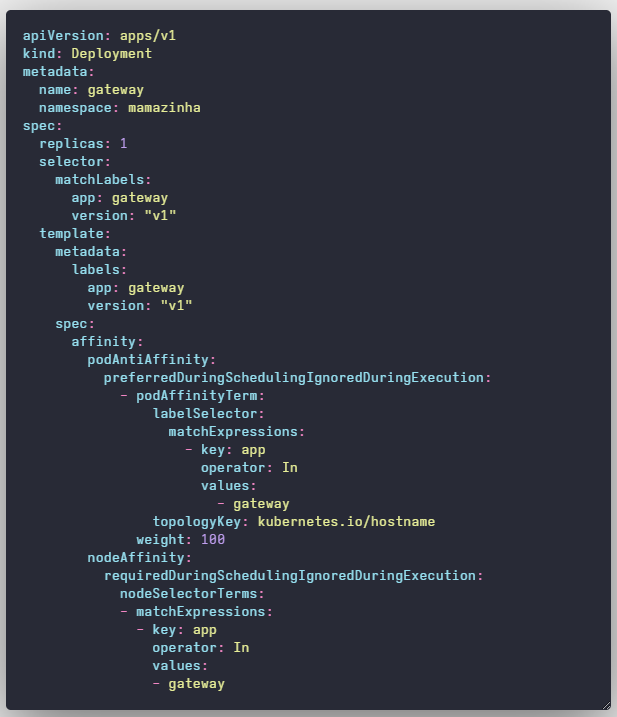
-
Change to
replicas: 0and apply the deployment yml to terminate every gateway running instanceskubectl apply -f gateway-k8s/gateway-deployment.yml -n mamazinha -
Change back to
replicas: 1and apply againkubectl apply -f gateway-k8s/gateway-deployment.yml -n mamazinha -
Repeat this for the other components if you want to deploy at a specific node.
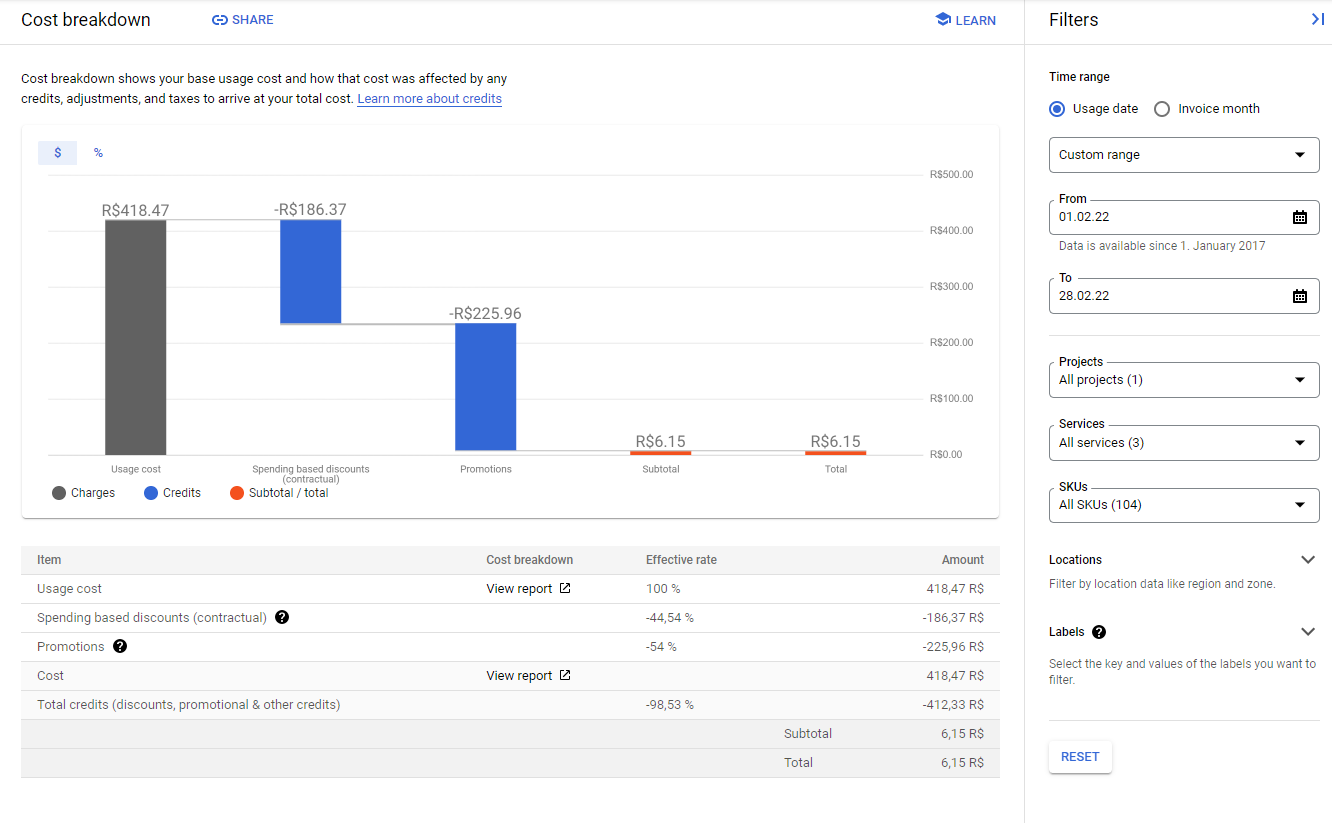
Here is the real cost of this configuration. I am from Brazil, so the costs are in my country’s currency. You can do the conversion by knowing that $1 Dollar was R$5,40 Reais when I capture the print screen from the following billing report.
Final setup
The preemptible VM cost 80% less than the regular machine, so my goal was to use only preemptible. The only way I figured it out to do this is to create persistent volume on my kubernetes cluster for each Postgres database because after 24h even the Postgres could be shut down without losing data.
First I port-forward the Postgres pods to backup the data using pgAdmin then I defined the persistence volume in the yml file:
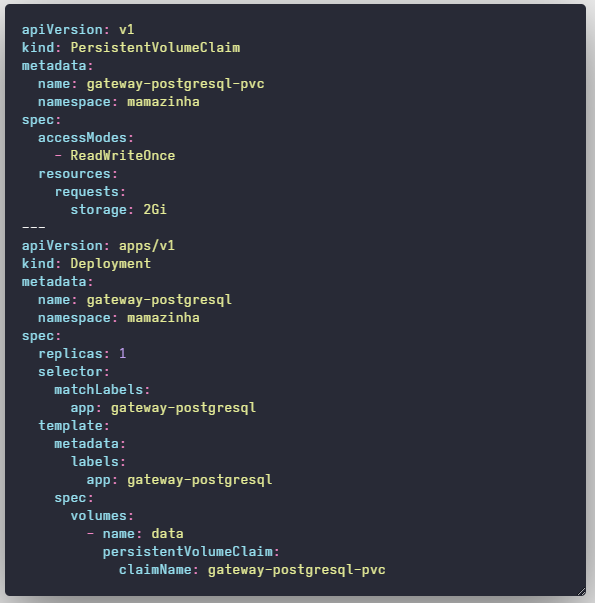
The next step was to delete the regular machine-type node pool then I resize the preemptible node pool to have 4 nodes.
After that, I apply both yml files ( kubectl apply -f baby-k8s/baby-postgresql.yml -n mamazinha and kubectl apply -f gateway-k8s/gateway-postgresql.yml -n mamazinha) and restore the backup using pgAdmin that will be stored at the persistent volume.
With this approach, my web app is going to have downtime every 24hrs. To mitigate that I decided to deploy everything simultaneously so after 24h everything will be shut down and going up in 2 minutes.

The final cost
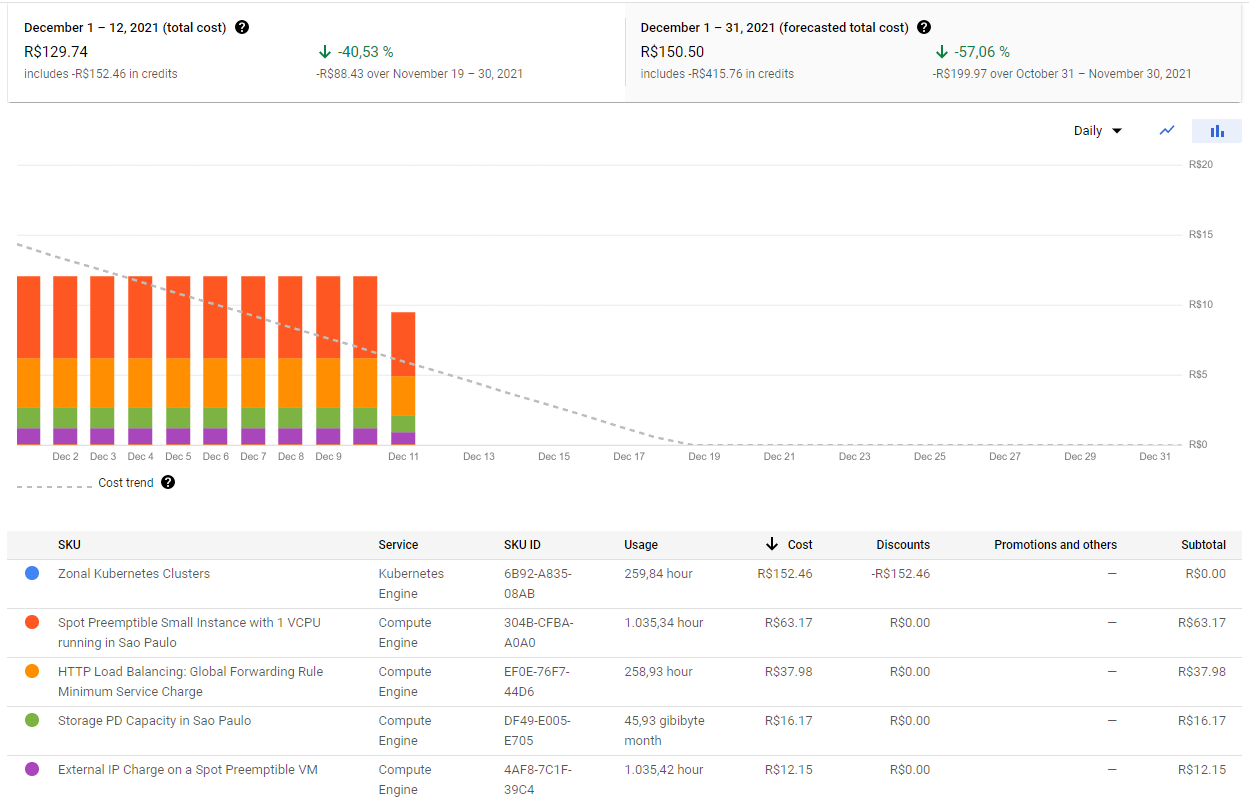
According to Google Pricing, the cluster manager fee will be free.
After using only preemptible nodes the cost was reduced a lot.
The invoice from January 2022 was R$844,09 (~$162.14), I don’t think it is too expensive. But I can’t afford this value by myself.
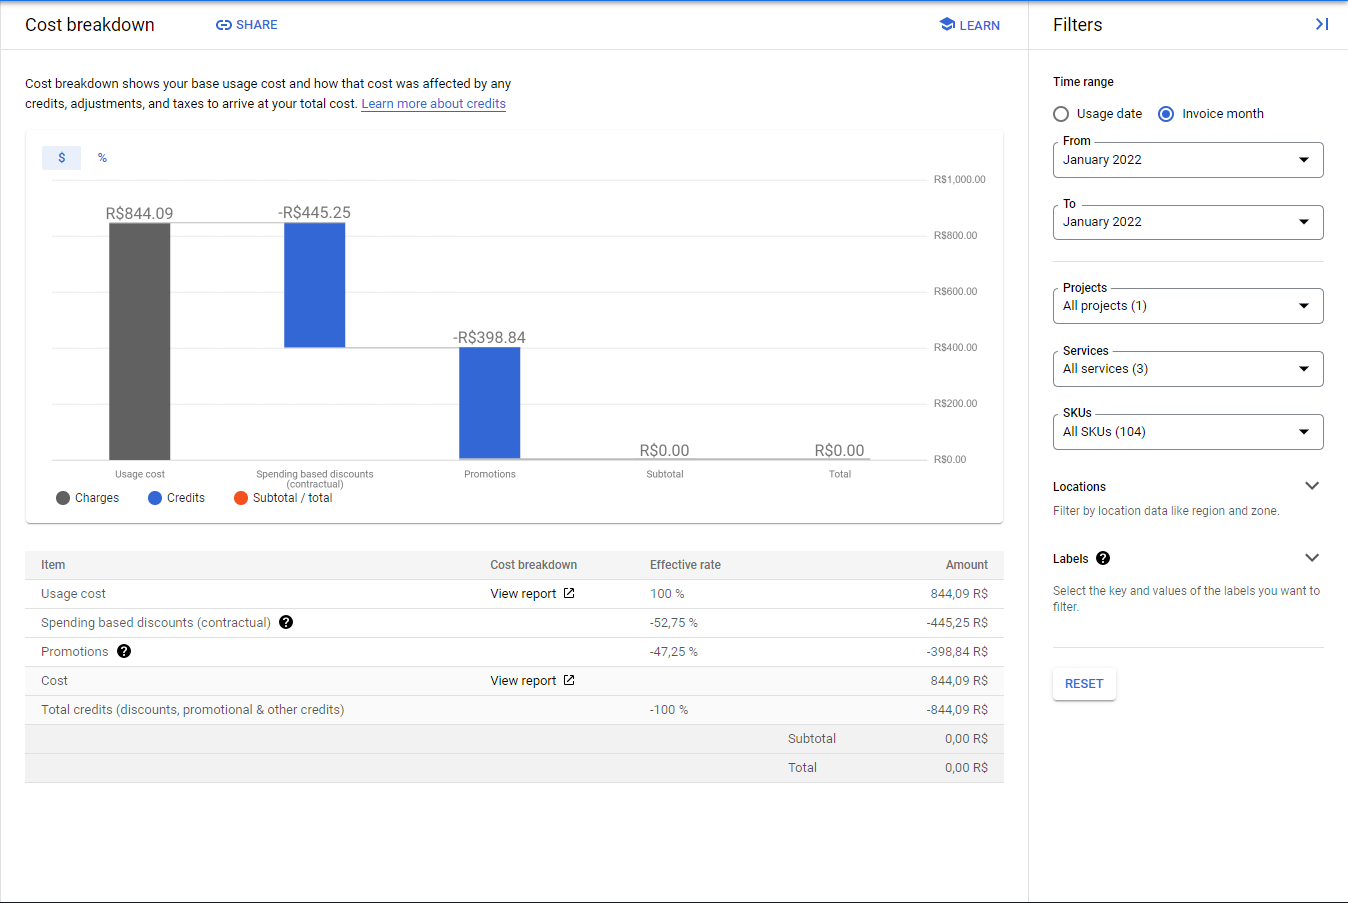
So I couldn’t keep the web app online on Google Cloud.
How was my experience with Google Cloud?
Google cloud platform is easy to use and I set things up quickly. I could learn while I was using it, I could undo, destroyed and build easily 😆
I think Google Cloud should have a real free plan for small microservices applications, so the user will pay when the product gain traction and started to be used ☺
Now it’s your turn! How was your experience with Google Cloud?
I will enjoy reading your comments 🤗
If you have any questions feel free to ask me anything here or Direct Message (DM) me on Twitter @renan_afranca (follow me and I will follow you back to unlock the DM option).
Lastly, let me extend an invitation to join me on my journey 🚀 in the realm of software development. I share my insights, experiences, and valuable resources on Twitter @renan_afranca 🐦 and LinkedIn 📎. Following me on these platforms not only keeps you updated on my latest posts and projects 📬 but also opens doors to vibrant discussions and learning opportunities. I look forward to connecting with you! 💼